


 This is the photo after the blur overlay took place. I really like this photo just because the colors. They are so dramatic! I also like the contrast with the houses and trees in the background.


This is a picture of the badge on the back of my car. This is the before picture.
 This is the picture after i got done editing it. I first of all cropped the photo to focus more on the badge. The filter was the neon glow filter. I chose the color to be a orangey, kind of like the color of my car. I then put a layer setting called difference on. This made the photo look almost negative with the contrasting teal color.. I reall like the way this came out.
 This is a photo I took of a sunset on Mcmahon road. This is the before picture.
 This is the photo after i got done editing it. As you can see the colors are very dramatic and pop extremely well. With this photo i did the neon glow filter with a reddish background. I then put the layer setting as color burn. This made the reds and oranges pop agains the back background so well.
Easy blur filter
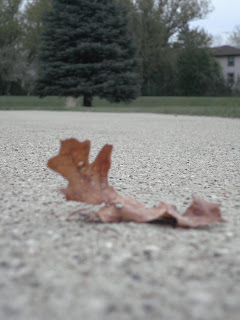
This a photo of a leaf that was in my driveway. I took it up close to keep the leaf more in focus as well as the main attention grabber. This is the original photo
 This is the photo after the easy blur filter was put on. The ground right in front is a little bit more out of focus. The trees in the background are also softer and have less detail. I also made thecolor more intense as well as darkened the picture a bit.

This photo is of my friend katie looking out onto the sunset. I took this with katie on the right side more to satisfy the rule of thirds. This is the before picture

This is the photo after i put the easy blur feature on. As you can see katie has softer edges which makes the photo more blendable. I also brighten the photo and made the saturation higher to help the colors pop.


No comments:
Post a Comment